Install Fedora Core 4 Linux
Introduction:
This procedure goes through the steps required to install Fedora Core 4 in detail.
Aim:
To install unconfigured base Linux.
Requirements:
- You have your hardware set up like this.
- If this is a full replacement for an existing OS and your hard-disk is currently partitioned, this may save a headache and some time.
- If you don't have an ISO burner on your PC, go here. If you do and you forget how to use it, go here.
- Go to http://download.fedora.redhat.com/pub/fedora/linux/core/4/i386/iso/.
- In turn, download these 4 .iso files on to your PC's hard disk:
- FC4-i386-disc1.iso
- FC4-i386-disc2.iso
- FC4-i386-disc3.iso
- FC4-i386-disc4.iso
- Burn each image to a CD - oh, and label them!:
- FC4-i386-disc1.iso ---> Fedora 4: 1 of 4
- FC4-i386-disc2.iso ---> Fedora 4: 2 of 4
- FC4-i386-disc3.iso ---> Fedora 4: 3 of 4
- FC4-i386-disc4.iso ---> Fedora 4: 4 of 4
- Put the CD labelled "Fedora 4: 1 of 4" into the CD drive.
- Power up your server.
- You have to be a bit quick here: Press [delete] to go to the CMOS Setup menu.
- Make sure your boot devices are in the order: CDROM, Hard Disk, Floppy. My settings for these are under the "Advanced BIOS Features" menu but yours will depend on which BIOS you have.
- Open the CDROM drawer and drop the CD labelled "Fedora 4: 1 of 4" in. Close the door.
- Exit the CMOS Setup menu and the system boots to the CD.
- You will see a splash screen:
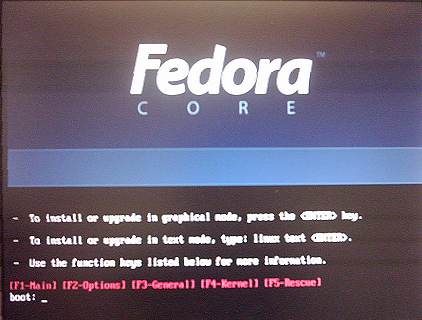
- This bit has to be a bit quick, too, or Linux boots anyway.
- boot: linux noprobe
- Normally, you would just type "linux" here. However, I had some problems when Linux tried to examine my hardware and "noprobe" turns this off. Nothing is lost because we will set up the hardware later.
- CD Found: [Skip] - Unless you want to check your CDs. I actually did this once and it told me there was a problem with all of them. They still installed OK, though, so I don't really think it's worth doing.
- Devices: [Done]
- This starts up the install GUI proper.
- Welcome...: [Next]
- Language Selection: -English (English)- [Next]
- Keyboard Configuration: -U.S. English- [Next]
- If you have an existing Linux install, you will be ask whether you want to Install or Upgrade. If you want to nuke your install and start from scratch, choose;
 Install Fedora Core
- [Next]
- Installation Type: Server [Next]
- Disk Partitioning Setup: Manually partition with Disk Druid [Next]
- If there are any partitions defined, delete them: -/dev/hda[n]- (where [n] is the disk number); [Delete]
- I have 1GB of RAM and received wisdom is that you should have double that for swap space. Create a 2GB swap partition:
- [New]
- Add partition: File System Type: -swap-
- Size(MB): 2048
- [OK]
- Create a 100MB boot partition:
- [New]
- Add partition: Mount Point: -/boot-
- File System Type: -ext3-
- Size(MB): 100
- [OK]
- Create a 40GB root partition:
- [New]
- Add partition: Mount Point: -/-
- File System Type: -ext3-
- Size(MB): 40960
- [OK]
- Create a ~30GB data partition (this is where Oracle will be installed):
- [New]
- Add partition: Mount Point: -/u01-
- File System Type: -ext3-
- Additional Size Options: Fill to maximum allowable size
- [OK]
- That's the partitioning done: [Next]
- Boot Loader Configuration: [Next]
- Firewall Configuration:
- No firewall (We will set this up later - not a stright-forward task)
- Enable SELinux: -Disabled- (Oracle doesn't like this and, hey, we don't really need it on a training / development box)
- [Next] - then [Proceed] at the Warning
- Time Zone Selection:
- Well, as I live in Sydney - the world's greatest city - I reckon I'll pick that one.
- [Next]
- Set Root Password:
- Decisions, decisions. We will be using a LOT of passwords for the full Data Warehouse installation. Apart from a few Linux users, there are a STACK of Oracle passwords required. Sooo, how about a standard approach?
- Enter the password twice: [Next]
- Package Group Selection:
- Just grab everything. We wouldn't want to miss out on something and it's not as if we're short of disk space. (NOTE: It is an opinion that you should install everything. There is a counter-argument here.)
- Scroll down to the bottom of the list. Second from the bottom, under "Miscellaneous":
 Everything: [Next]
 - About to Install:
- [Next] - For some mysterious reason, you might have to click this twice.
- You could get a fatal error at this time; a popup that reads something like:
- Error informing the kernel about modifications to partition /dev/hda2 - Device or resource busy. This means that Linux won't know about any changes you made to /dev/hda2 until you reboot - so you shouldn't mount it or use it in any way before rebooting.
- To fix this, go here.
- Popup: Required Install Media:
- [Continue]
- Installing Packages:
- Time for a break now as the software installs. Come back about every 20min to change CDs. That means that there are 3 20min periods where you don't have anything to do. You can:
- Make yourself a nice cup of tea.
- Walk the dog.
- Kiss the missus - or, if you are a real Linux geek, you could kiss a life-size cardboard cutout of Carrie Anne Moss.
- Note: I had a couple of error pop-ups during this process - something to do with can't find package / corrupt CD / etc. I got away with it by pulling the CD out and wiping it on my shirt (the one without the pizza stains). That may work for you or you may have to burn a new CD. Either way, you shouldn't need to start the install all over again. Just do your thing and click [Retry].
- Congratulations, the installation is complete:
- Take out the last CD.
- [Reboot]
- As the box reboots, you can watch the boot sequence by clicking a little arrow labelled; > Show Details. You should see a list of processes starting and [ OK ] against each one.
- Welcome: [Next]
- License Agreement:
- Yes, I agree to the License Agreement
- [Next]
- Date and Time:
- Check the date and time and adjust if necessary. [Next]
- Display:
- Resolution: -1024x768- [Next]
- System User. I set up one user at this point - Steve. Once Linux is configured, you shouldn't really be logging in directly as root. Normally, you would log in as a general user and then su - root when you have to.
- Username: steve
- Full Name: Steve
- Password: Have you tried this? [Next]
- Sound Card:
- I have a card but it's not connected to any speakers 'cos I don't use it. Sound really comes into its own for games but I won't be playing any on this box. Sooo: [Next]
- Additional CDs:
- I'm not installing anything else at the moment: [Next]
- Finish Setup: [Next]
- Setup completes and takes you to the login screen:

- Log in as root:
- Username: root
- Password: *********
- Set up root's desktop.
- Log out and in as steve.
- Set up Steve's desktop.
We don't really need to extensively test the installation at this stage. Suffice to say; if you successfully got to the Desktop and can open a Terminal, most of it is running and good.
posted by Cat Play Crew at
1:28 pm
![]()
![]()

0 Comments:
Post a Comment
<< Home